Creating Custom Functionality in Drupal 10

Firas Ghunaim
Understanding Drupal 10 Custom Functionality: A Comprehensive Guide
Background and Prerequisites
To effectively create custom functionality in Drupal 10, a solid foundation in Drupal development is essential. This requires familiarity with PHP and an understanding of Drupal's architecture and module system. Such skills are crucial for crafting custom modules in Drupal 10.
Exploring Custom Module Possibilities
Custom modules offer a gateway to limitless possibilities for extending Drupal's functionality, catering to your website's unique needs and requirements. Consider the following scenarios where custom modules can be employed:
-
Third-party API Integration: Integrate with external services and applications using custom modules. Fetch data from external sources, send requests to APIs, and seamlessly incorporate their functionalities into your Drupal site.
-
Complex Business Logic Implementation: Implement intricate business logic scenarios that go beyond the capabilities of pre-built modules. Handle complex calculations, manage workflows, and automate tasks tailored to your specific business processes.
-
Enhanced User Experience: Elevate the user experience by creating custom modules that enhance user interactions, improve accessibility, and personalize the user journey. Develop custom widgets, implement dynamic interactions, and tailor the user interface to match your brand and design principles.
Examples of Popular Custom Modules
Drupal 10 boasts a rich ecosystem of custom modules that exemplify the power and versatility of customization. Here are a few notable examples:
-
Views: Create dynamic lists and grids of content using Views, a highly versatile module that allows you to filter, sort, and display content in various formats.
-
Paragraphs: Build flexible and reusable content structures with Paragraphs, enabling you to create complex layouts and manage content arrangements with ease.
-
Webform: Develop customized forms with advanced features using Webform. Create surveys, collect user feedback, and automate form-based processes with enhanced capabilities.
Key Elements of Module Development
To effectively create custom functionality in Drupal 10, understanding the key elements of module development is paramount:
-
Module Structure: A typical Drupal module consists of various files, each serving a specific purpose. The .info.yml file defines the module's metadata, the .module file contains the module's logic, the .routing.yml file handles routing configurations, and templates provide the module's front-end presentation.
-
Hooks: Hooks are the backbone of module development, allowing modules to interact with Drupal's core and other modules. Utilize hooks to alter default behaviors, add custom functionality to events, and integrate your module seamlessly into Drupal's ecosystem.
-
Documentation: Clear and concise documentation is crucial for maintainability and collaboration. Document your module's purpose, usage, and code structure to aid future developers in understanding and modifying your module.
-
Coding Standards: Adhere to Drupal's coding standards to ensure consistent and secure code. Follow naming conventions, indentation rules, and best practices to promote maintainable and scalable modules.
Step-by-Step Guide to Custom Drupal 10 Module Development
Creating a custom module in Drupal 10 involves several key steps:
-
Planning: Define the module's purpose and functionality. Identify the features it needs and how it will integrate with existing systems.
-
Setting Up: Create a new folder in the '/modules/custom/' directory of your Drupal installation. Name it after your module.
-
Coding: Begin by writing the .info.yml file, which contains basic information about your module. Here’s a simple example:

-
Implementing Hooks: Use Drupal hooks to interact with the core system. For example,
hook_form_alter()can be used to modify forms. Learn more here. -
Testing: Rigorously test your module for functionality, security, and performance issues.
-
Deployment: After thorough testing, deploy the module to your live site.
Addressing Common Challenges
Developers often face challenges such as keeping up with Drupal's frequent updates and ensuring module compatibility. To mitigate this, regularly review Drupal community updates, and test your module with the latest Drupal version. Another challenge is managing dependencies; use Composer to handle external libraries your module might need.
Performance Optimization Tips
Optimizing the performance of custom modules is crucial. Here are some tips:
- Efficient Code: Write clean and efficient code by utilizing Drupal's built-in functions and libraries.
- Caching Strategies: Implement Drupal's caching systems like Cache API and Render API to store data and reduce database load.
- Database Query Optimization: Minimize database queries and use Drupal's Database API effectively to retrieve and manipulate data.
Security Best Practices
Securing custom modules is vital to protect your Drupal site:
- Input Validation: Always validate and sanitize user inputs to prevent SQL injection and cross-site scripting (XSS) attacks.
- User Permissions Handling: Implement strict permission checks in your modules to control access to different functionalities.
- Security Against Vulnerabilities: Regularly update your modules and follow Drupal security advisories to protect against known vulnerabilities.
Drupal 10 New Features and Their Impact on Module Development
Drupal 10 introduces improved APIs and enhanced support for decoupled architectures, making it easier to build advanced, interactive web experiences. It also offers better accessibility features and a more intuitive admin interface, streamlining the content management process.
Drupal 10 introduces several significant improvements that can impact custom module development. Key features include:
- Improved Caching Mechanisms: Drupal 10 enhances its caching capabilities, reducing server load and speeding up response times. Custom modules can leverage these improvements for more efficient data retrieval and storage.
- Updated APIs: The introduction of updated APIs in Drupal 10, such as the JSON:API for better RESTful web services, allows developers to create more robust and scalable modules. These APIs facilitate easier integration with external systems and services.
Code Snippets for Clarity
When developing custom functionality, code clarity and adherence to Drupal standards are crucial. For example, to create a custom block, you would use the following snippet in your .module file:
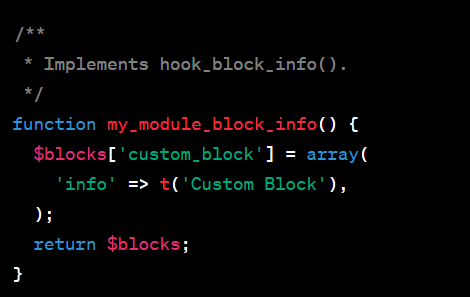
This snippet defines a new block named 'Custom Block' in Drupal.
To illustrate Drupal 10's advanced functionalities, consider the following code snippets:
- Creating a Custom Form
use Drupal\Core\Form\FormBase;
use Drupal\Core\Form\FormStateInterface;

class CustomForm extends FormBase {
  public function getFormId() {
    return 'custom_form';
  }

  public function buildForm(array $form, FormStateInterface $form_state) {
    // Form creation code goes here
    return $form;
  }

  public function submitForm(array &$form, FormStateInterface $form_state) {
    // Form submission handling code goes here
  }
}
- Defining a New Content Entity Type
// Define a new entity type in a .yml file
id: custom_entity
label: 'Custom Entity'
base_table: custom_entity
entity_keys:
  id: id
  label: name
Setting Up Your Custom Drupal Module
Naming and Placing Your Module
Begin by creating a folder in modules/custom directory. For instance, for a "Custom Contact Form Fields" module, create modules/custom/custom_contact_form_fields. This structure helps Drupal identify and manage your custom code separately from core or contributed modules.
Module Naming Best Practices
The name of your module should communicate its functionality clearly.
- Uniqueness: Ensure the name doesn’t clash with existing modules. Use Drupal.org to check existing module names.
- Descriptive: Names like
custom_contact_form_fieldsinstantly inform about the module's purpose, unlike vague names likecontact_module. - Prefixing: Consider prefixing your module name with your organization's name or acronym to avoid conflicts and increase recognizability.
Tips for Efficient Module Organization
Effective organization of your module's files is crucial for maintainability and readability.
- Directory Structure: Create directories within your module for different types of code. For example, all form-related classes should be in
modules/custom/custom_contact_form_fields/src/Form. Similarly, put your service classes insrc/Service, and any custom plugins insrc/Plugin. - Naming Conventions: Follow Drupal's naming conventions. For instance, if you have a form named
CustomContactForm, the file should beCustomContactForm.php. - Use Namespaces: Namespace your classes according to their path. For a form class, the namespace would be
Drupal\custom_contact_form_fields\Form. - Template Files: Store any Twig templates in a
templatesdirectory to separate your UI from your logic.
Creating .info.yml File
The .info.yml file is crucial. Here's an example for our module:
name: 'Custom Contact Form Fields'
type: module
description: 'Adds additional fields to the contact form.'
package: Custom
core_version_requirement: ^10.x
dependencies:
  - drupal:contact
  - drupal:field
Each line represents a key piece of information about your module, like dependencies indicating necessary modules.
Managing dependencies can be tricky but is essential for the smooth functioning of your module.
- Specifying Dependencies: In your
.info.yml, list modules that your custom module depends on underdependencies. This ensures they are present and enabled for your module to work. - Version Constraints: You can also specify version constraints for dependencies to ensure compatibility.
Incorporating Default Configuration
Utilizing configuration management allows you to provide default settings for your custom Drupal 10 module seamlessly. By creating configuration files within your module, you can define default values for various settings.
Include default settings in your module using configuration files, like config/install/custom_contact_form_fields.settings.yml, with content like:
contact_form_field_setting: 'Default Value'
These configuration files act as blueprints when users install or enable your module. They ensure that the necessary configuration settings are in place, saving time and effort for users.
By incorporating default configuration, you enhance the user experience by providing a ready-to-use module with sensible defaults. Users can then customize these settings according to their specific requirements.
Understanding Drupal's Hook System in Context
Hooks are a vital part of Drupal's architecture, allowing modules to interact with the core.
- hook_form_alter() Example: This hook can be used to alter any form in Drupal. For example, adding an extra field to all contact forms.
- Implementing a Hook: In your module's
.modulefile, implementhook_form_alter()likemymodule_form_alter(&$form, \Drupal\Core\Form\FormStateInterface $form_state, $form_id). - Use Case Specificity: Only implement hooks that are necessary for your module’s functionality to avoid unnecessary processing.
Debugging and Troubleshooting Tips
Effective debugging is crucial for any development process.
- Tools: Utilize modules like Devel for debugging. Tools like WebProfiler, part of the Devel suite, provide a toolbar with performance metrics and query logs.
- Error Reporting: Enable error reporting in your local development environment by configuring your site's
settings.php. - Xdebug Integration: Use Xdebug with your IDE for step-by-step debugging and breakpoint management.
Best Practices for Module Maintenance
Regular maintenance is key to a secure and efficient module.
- Stay Updated: Regularly check for and apply security updates from Drupal.org.
- Coding Standards: Follow Drupal Coding Standards to ensure code quality.
- Version Control: Use Git for version control. Host your code on platforms like GitHub or GitLab for collaborative development.
- Automated Testing: Implement automated testing to catch bugs early in the development cycle.
Useful Links
- Visit Drupal API Reference for detailed documentation on functions, classes, and interfaces.
- Drupalize.Me offers tutorials ranging from beginner to advanced levels.
- Engage with the Drupal community through forums on Drupal.org.
Basic Module Building Blocks
Routing and Navigation in Drupal 10
In Drupal 10, routing is key to defining how URLs map to specific functions or pages in your module.
-
Defining Routes: Create a YAML file, typically named
your_module.routing.yml, where you define routes. Each route includes a path, a controller, and additional options. For example:
your_module.some_route_name:
  path: '/example-path'
  defaults:
    _controller: '\Drupal\your_module\Controller\ExampleController::content'
  requirements:
    _permission: 'access content'
This defines a route to a controller method that's executed when users visit /example-path.
-
Dynamic Routes: You can make routes dynamic by using parameters. For example,
/example-path/{param}, where{param}is a variable.
Implementing a Basic Controller
Controllers are the heart of handling logic in your Drupal module.
- Creating a Controller: In your module, create a
Controllerdirectory undersrc. Inside, create a PHP class that extendsDrupal\Core\Controller\ControllerBase.
Controller Methods: Define methods for each action your module performs. These methods return render arrays or HTML responses. Here's a simple example:
namespace Drupal\your_module\Controller;

use Drupal\Core\Controller\ControllerBase;

class ExampleController extends ControllerBase {
  public function content() {
    return [
      '#markup' => $this->t('Hello, World!'),
    ];
  }
}
Adding Menu Links
Menu links provide easy access to your module’s functionalities.
-
Defining Menu Links: Use a YAML file named
your_module.links.menu.yml. Here you can define your menu items and their properties. For example:
your_module.some_menu_link:
  title: 'My Custom Page'
  description: 'A description of the page.'
  route_name: your_module.some_route_name
  parent: system.admin_structure
  weight: 100
-
Hierarchical Structure: To create sub-menus or group related links, use the
parentkey to specify the parent menu item. -
Dynamic Menu Links: You can create dynamic menu links based on user roles, permissions, or other conditions using
hook_menu_links_discovered_alter()in your module's.modulefile.
It's important to ensure your menu links are intuitive and well-structured. Avoid overcrowding the menu and group related items for better user experience.
Advancing Custom Functionality in Drupal 10
Developing Custom Blocks
Custom blocks in Drupal are instrumental in enhancing site functionality and user experience.
- Creating Block Plugins: To create a custom block, define a block plugin by extending
Drupal\Core\Block\BlockBase. For example:
namespace Drupal\your_module\Plugin\Block;
use Drupal\Core\Block\BlockBase;

/**
 * Provides a 'CustomBlock' block.
 *
 * @Block(
 *   id = "custom_block",
 *   admin_label = @Translation("Custom Block")
 * )
 */
class CustomBlock extends BlockBase {
  /**
   * {@inheritdoc}
   */
  public function build() {
    return [
      '#markup' => $this->t('Content of custom block.'),
    ];
  }
}
- Configuring Blocks: Define configuration options in the block plugin to control aspects like title, visibility, and cache settings.
- Placing Blocks: Once created, blocks can be placed in various regions of your Drupal site via the Block Layout interface.
Extending with Field Types and Widgets
Custom field types and widgets enhance data handling and user interaction.
- Creating Custom Field Types: To store specialized data, define a custom field type by extending
Drupal\Core\Field\FieldItemBase. This allows you to create fields tailored to specific data structures. - Developing Custom Form Widgets: Enhance data input by creating custom widgets. For example, a color picker widget can be created by extending
Drupal\Core\Field\WidgetBase. Custom widgets enhance the content editing experience and offer more intuitive interfaces.
Customizing with Events and Hooks
Utilize Drupal's event system and hooks for advanced customization.
- Using Events: Implement event listeners to react to various system events. For instance, you can create a listener for node creation (
hook_node_insert) to trigger an action, like sending an email notification. - Implementing Hooks: Hooks like
hook_form_alterorhook_node_accessallow for deep customization of Drupal's behavior. This could include altering forms provided by core modules or controlling access to nodes.
Mastering Drupal 10 Views and Plugins
Creating a Views Display Style Plugin
Custom display style plugins in Views offer unparalleled flexibility in presenting data.
Understanding Views: Familiarize yourself with Views in Drupal. Views allow you to query data from your database and present it in various formats like tables, lists, or grids.
Follow those Plugin Development steps:
- Define the Plugin: Create a PHP class for your plugin in your module’s
src/Plugin/views/styledirectory. This class should extendDrupal\views\Plugin\views\style\StylePluginBase. - Annotate Your Plugin: Use annotations to define the plugin's metadata. For instance:
/**
 * Defines a custom style plugin.
 *
 * @ViewsStyle(
 *   id = "custom_style",
 *   title = @Translation("Custom Style"),
 *   help = @Translation("Renders rows with a custom style."),
 *   theme = "views_view_custom_style",
 *   display_types = {"normal"}
 * )
 */
- Implement Rendering Logic: Override methods like
render()to define how your data is outputted. - Create a Twig Template: If your style requires a custom template, create a Twig file in your module’s
templatesdirectory. - Integration with Drupal's UI: Once defined, your new style will be available in the Views UI, allowing site builders to select it like any other style plugin.
Harnessing Twig Extensions
Twig extensions in Drupal 10 enable developers to enhance their theming capabilities.
-
Understanding Twig in Drupal: Twig templates in Drupal are used for outputting HTML. They separate logic from presentation and offer a clean syntax.
-
Creating Custom Extensions:
- Define a Twig Extension Class: Create a PHP class in your module that extends
\Twig\Extension\AbstractExtension. - Add Custom Functions or Filters: Implement methods to add your custom functions or filters. For example, you might add a new function to format dates in a specific way.
- Register Your Extension: Use Drupal’s service container to register your Twig extension as a service.
- Define a Twig Extension Class: Create a PHP class in your module that extends
Practical Applications: Custom Twig extensions can be used to add new functionality like formatting options, making API calls, or generating dynamic content within your Twig templates.
Keep your Twig extensions modular and reusable. Document your custom functions and filters to make them easy to understand and use by other developers.
Implementing Dynamic Content Generation
Generating Lorem Ipsum Dynamically
Using Lorem Ipsum is beneficial for testing and design purposes. Here's how to use the Devel module for dynamic content generation:
- Installing the Devel Module: First, ensure that the Devel module is installed and enabled. It can be downloaded from Drupal.org and installed via Drupal's Extend section or using Composer.
- Using devel_generate: This submodule of Devel is specifically for generating dummy content.
- Navigate to Configuration > Development > Generate content.
- Here, you can specify parameters like the number of nodes, users, terms, and the range of content dates.
- For generating Lorem Ipsum, specify the content type and the number of paragraphs. The module will then create content filled with placeholder text.
- Customization Options: Devel allows customization of the generated content. For instance, you can choose specific content types for which to generate Lorem Ipsum, controlling the length and quantity of the content.
Adding CSS and JS Assets
Enhancing your site’s frontend with CSS and JS is crucial for functionality and aesthetics.
-
Enqueuing Assets: In Drupal 10, the best practice is to define your CSS and JS in a
.libraries.ymlfile in your module's root. For example:
my_module:
  css:
    theme:
      css/my_module.styles.css: {}
  js:
    js/my_module.scripts.js: {}
  dependencies:
    - core/jquery
-
Organizing Asset Files: Store your CSS files in a
cssdirectory and JS files in ajsdirectory within your module. This separation keeps your module organized. -
Loading Assets: To load these assets, attach them in your render arrays or forms. For example:
$form['#attached']['library'][] = 'my_module/my_module';
-
Performance Optimization: Drupal’s caching system automatically handles the caching of your assets. Optimize your assets for performance by minifying CSS and JS files and ensuring they are loaded only where necessary.
-
Drupal’s Standards: Follow Drupal's standards for asset inclusion. For instance, use libraries for group assets, and dependencies to manage external libraries like jQuery.
Creating Custom Entities in Drupal 10
Step-by-Step Guide for Custom Entities
Creating custom entities involves several key steps. Let’s break them down:
-
Initial Setup:
- Create Your Module: Ensure you have a custom module set up in Drupal. If not, create one by following Drupal’s module creation guidelines.
- Create Your Module: Ensure you have a custom module set up in Drupal. If not, create one by following Drupal’s module creation guidelines.
-
Define the Entity Type:
- Create Entity Class: In your module, under
src/Entity, create a PHP class for your entity. For example,CustomEntity.php. - Use Annotations: Annotate your class to define the entity. Include details like
id,label,base_table, and others. - Entity Class Content: Implement necessary methods like
baseFieldDefinitions()to define your entity's fields.
- Create Entity Class: In your module, under
/**
 * @ContentEntityType(
 *   id = "custom_entity",
 *   label = @Translation("Custom Entity"),
 *   base_table = "custom_entity",
 *   ...
 * )
 */
class CustomEntity extends ContentEntityBase {
  // Your code here
}
- Adding Fields to Your Entity:
- Field Definitions: In
baseFieldDefinitions(), define the fields your entity will have. Use Drupal field types for properties like text, dates, images, etc. - Example Field Definition:
- Field Definitions: In
public function baseFieldDefinitions(EntityTypeInterface $entity_type) {
  $fields = parent::baseFieldDefinitions($entity_type);

  $fields['title'] = BaseFieldDefinition::create('string')
    ->setLabel(t('Title'))
    ->setDescription(t('The title of the Custom Entity.'))
    ->setRequired(TRUE);

  // Add more fields as needed

  return $fields;
}
-
Implementing Bundles (If Needed):
- Define Bundle Method: If your entity will use bundles (like different types of products), implement the method to handle them.
- Bundle Usage: Utilize this feature for entities that have different variations with distinct fields.
-
Entity Hooks for Custom Logic:
- Hook Implementation: Utilize Drupal hooks to add custom logic during your entity's lifecycle (e.g.,
hook_entity_presave()). - Custom Actions: Implement actions like validation, altering properties before saving, or logging activities.
- Hook Implementation: Utilize Drupal hooks to add custom logic during your entity's lifecycle (e.g.,
-
Building Custom Forms for Your Entity:
- Customize Forms: Override entity form classes to customize the add/edit forms.
- Example:
class CustomEntityForm extends ContentEntityForm {
  // Custom form alterations
}
-
Views Integration:
- Create Views: Utilize Views to list and display your custom entity data.
- Custom Displays: Configure filters, fields, and formats in Views to present your data as needed.
Additional Tips
- Testing Your Entity: After defining your entity, test it thoroughly. Create, edit, and delete instances to ensure all parts of your entity work as expected.
- Documentation and Comments: Document your code. Use comments to explain the purpose of different parts of your entity class.
- Stay Updated: Keep abreast of changes in Drupal’s entity API for future updates or improvements.
Extending Twig Functionality
In the previous section, we learned about creating custom entities in Drupal 10. Now, let's explore how to extend Twig functionality to further customize our Drupal themes.
Utilizing TwigExtension Class
Twig extensions in Drupal offer a powerful way to add custom functionality to your Twig templates. Here’s a detailed guide:
-
Setting Up a Custom Twig Extension:
- Module Setup: Start with a custom module. If you don't have one, create it following Drupal’s module creation guide.
- Create the Extension Class: Inside your module, create a directory structure like
src/Twig, and add a file namedCustomTwigExtension.php. - Extending Twig_Extension:
- In
CustomTwigExtension.php, define your class by extending the baseTwig_Extensionclass. - Example:
- In
namespace Drupal\your_module\Twig;

use Twig\Extension\AbstractExtension;
use Twig\TwigFunction;

class CustomTwigExtension extends AbstractExtension {
  public function getFunctions() {
    return [
      new TwigFunction('custom_hello', [$this, 'customHello']),
    ];
  }

  public function customHello($name) {
    return "Hello {$name}!";
  }
}
-
Registering the Extension:
- Service Definition: In your module’s
.services.yml, register your Twig extension as a service. - Example:
- Service Definition: In your module’s
services:
  your_module.twig_extension:
    class: Drupal\your_module\Twig\CustomTwigExtension
    tags:
      - { name: twig.extension }
-
Implementing Custom Functions:
- Defining Functions: Use methods like
getFunctions()to define your custom Twig functions. - Example Usage: In your Twig templates, you can now use
{{ custom_hello('John') }}, which outputs "Hello John!". - Parameters and Return: Your custom functions can accept parameters and return values to be used within templates.
- Defining Functions: Use methods like
-
Creating Custom Filters and Tags:
- Custom Filters: Similar to functions, define filters in methods like
getFilters(). - Custom Tags: Though more advanced, you can also define custom Twig tags, which requires a deeper understanding of the Twig compiler.
- Custom Filters: Similar to functions, define filters in methods like
Best Practices and Tips
- Performance Consideration: Ensure your Twig extensions are efficient, especially when they are used in multiple places across your site.
- Debugging: Test your Twig functions and filters thoroughly. Utilize Drupal’s debugging tools for any issues.
- Documentation: Comment your code for clarity, especially explaining what each custom function or filter does.
- Modular Design: Keep your Twig extensions modular, which makes them reusable across different projects or parts of your website.
Conclusion
So there you have it, a comprehensive guide to creating custom functionality in Drupal 10. Throughout this article, we've explored the various aspects of building custom modules, extending Twig functionality, implementing dynamic content generation, and creating custom entities. By mastering these techniques, you can take your Drupal development skills to the next level.
Now that you have a solid understanding of Drupal 10's custom functionality capabilities, it's time to put your knowledge into practice. Start experimenting with your own custom modules and explore the endless possibilities that Drupal offers. Remember to stay curious, keep learning, and don't be afraid to dive deeper into the Drupal community for support and inspiration.
Happy coding!
Frequently Asked Questions
How can I create custom functionality in Drupal 10?
To create custom functionality in Drupal 10, you can set up a custom module. This allows you to add specific features or modify existing ones according to your needs. By leveraging Drupal's modular architecture, you can extend its functionality and tailor it to suit your requirements.
What are the basic building blocks of a Drupal 10 module?
The basic building blocks of a Drupal 10 module include hooks, which allow you to interact with the core system and other modules. You can define hooks to respond to events or alter the behavior of certain functionalities. You can use controllers, services, and plugins to implement specific logic within your module.
How do I extend Twig functionality in Drupal 10?
To extend Twig functionality in Drupal 10, you can create custom Twig templates that override the default ones provided by core or contributed modules. By doing so, you have full control over the HTML markup generated by your theme or module. This enables you to customize the presentation layer according to your design requirements.
What is dynamic content generation in Drupal 10?
Dynamic content generation refers to generating content on-the-fly based on certain conditions or user input. In Drupal 10, this can be achieved using various techniques such as creating custom views with contextual filters and exposed filters, implementing dynamic queries with EntityFieldQuery or Database API, or using AJAX callbacks for interactive content updates.
How can I create custom entities in Drupal 10?
Creating custom entities in Drupal 10 involves defining entity types using the Entity API provided by core. You need to specify properties (fields) for your entity type and define how it interacts with other entities through reference fields or entity references. With this approach, you can build complex data structures tailored specifically for your project's needs.
You might find this interesting: